skip to main |
skip to sidebar
I have dripped some AAIs and Alcohol down on an great Encausticcard, (DinA 5) then I cut it in stripes and
stamped over with black Memento. Then I glued one stripe on. The punched out sun is inserted from the top

I have drawn and wiped the landscape and bushes myself, witch and birds are stamped,
......
..
I love the Encaustic technique and today since a long time I tried it once again. I melted different coloured wax
crayons on the Encaustic Iron and "painted" them on an Encaustic card just for fun without thinking of real
nature. At last I glued the stamped coloured girlfriends on top. Perhaps you like my abstract landscape.


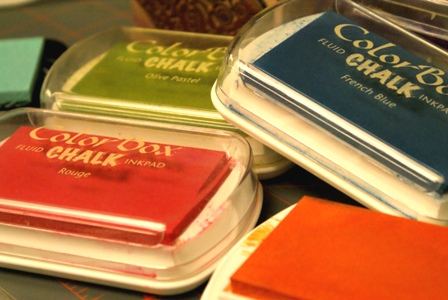
I stamped different leaves and berries stamps in several color box chalk inkpads for a soft
looking, inspired by this. I hope you like my card too, I'm glad if you leave a comment.
...
My tag glossy background is made with this Crayon Resist technique. Then I
stamped my new lovely young couple and some branches with black Ancient Page.
.....

I took a magazin page and put a stencil on this, then I used nail polish remover to decolor the free
areas from the stencil like I did here. There are a lot of samples how you can still use nail remover,
to create art works.The description about photomelting you can see here.I am pleased if you like it.
....
I know the technique to Torn Off Surfaces from magazins with glue stripes for a long time, I named it TOS Now I saw such technique still with stencils, you can learn it in some Videos here with the titel:
"Stencil Packing Tape Transfer". I added the first of Dina Wakley's face stamps with butterflies
and arms and legs from Zettiology. Here is my first result. I wish you a lot of fun, if you try it too.


I colored a cardstock as descripted here. Then I put the paper branches mask twice one after another on the background and wiped around
with brown.
(see the 2. card) After wiping, I covered the middle of the meanwhile spotty brown wiped paper mask with light Pan Pastells and glued them on top.


I found this masking idea here and I must try it immediately. For the background I've taken the page beside.
It was a great fun and I will make surely more. That's a wonderful possibility to delete paper scraps or
leftovers. Do you you like my first result? Please leave me a comment. Thanks my dear visitors.


I colored a Din A 5 card (size 8,27 x 5,75) again with crayon resist technique.and cut them in 3 parts.and glued on black glossy. After that I stamped the white web in the right edge below, then the ghost, girls and bat, colored them, altered Twinkie's eyes, nose and teeth and glued all motifs with the moons on. I hope you have fun with this.


Isn't it a horrible creepy flying beast?! I don't want to meet him, therefore I stay at home,
if he flies his evening rounds.*g*
The background is wiped and stamped,( 2. image) the flying beast
is a magazin cut out, highlighted with white gelpen like clouds and stars. I painted soft shadows around the town. If you like it, please leave me a comment.


Since my school days I love crayons. There are a lot of techniques you can do with crayons. I love
most Batik technique (Resist) and Encaustic, but everything else what I can do with. So I create
this background with lots of randomly drawn lines with different colored water resist crayons.
After that I overpainted with black watercolor and let dry. Then I combined the 2 different
magazin cut outs altered a bit mouth, teeth, eyes and hairs and added the little hat. I very much
enjoyed creating this card. I hope you has fun too, and if you like it please leave a comment
....
For the background I let Dylusions drops run from above down. Then I wiped a little card
with the same colors and used the I-stencil face. Only inside the face I draw a bit more dark
with brown pencil and white gelpen for the eye dots. At last I glued the little image on top.
I hope you like it a little bit. I'm glad if you leave a comment. It means a lot to me, thanks.


I found these Videos and this is my new inspiration for my card Video1 and Video2 In the 1.Video is the
result clearly but you must wait until the second half. By my glossy card I take the stencil once again
and dabbed over the Mod Podge pattern after drying with black. look below) I hope you like my first try.


 I let my fantasy flow and drew in the bubbles
  It wasn't so easy because the bubbles


.jpg)


